Your outdoor solar lights not working?
It’s a more common issue than you might expect, often due to simple, fixable causes.
I’m an electrical engineer with over 5 years of experience in the solar industry.
In this article, I’ll help you understand why your solar lights aren’t working and guide you on how to fix them.
Let’s get your solar light back on.
Key Takeaways
- To start, if your new solar light isn’t working, check and remove the pull tab on the battery, which prevents discharge during shipping.
- The lifespan of solar lights’ rechargeable batteries is typically 300-500 charges, and a decrease in light duration can indicate it’s time to replace them.
- Damaged wiring between the solar panel and battery is a frequent cause of solar light failure, requiring inspection and repair.
- Faulty light sensors can prevent solar lights from turning on; cleaning the sensor, checking its position, and adjusting settings may resolve this.
- Reposition solar lights away from artificial lights like street lamps, which can interfere with the sensors and affect functionality.
Why Your Solar Lights Aren’t Working?
1. It Has A Pull Tab
If you’ve recently purchased solar lamps and they’re not working, one common reason could be the presence of a pull tab on the battery.
A pull tab is a small piece of insulator that is specially designed to prevent batteries and circuits from energizing — protecting them during shipping and storage.
In simpler terms, this pull tab ensures that your solar light remains off until you’re ready to use it.
If this pull tab is not removed, the solar light will not turn on, even when the battery is fully charged.
Therefore, always check and remove the pull tab before using your new solar light.

2. Depleted Rechargeable Batteries
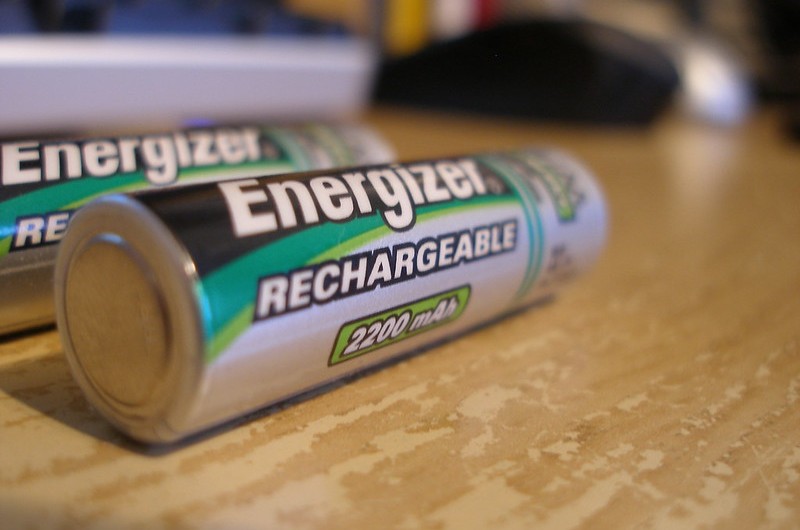
People tend to forget that solar lights’ rechargeable batteries have a lifespan of roughly 300 – 500 charges.
Over this period, the solar batteries’ charging capability will gradually decrease until they become faulty.
This gradual loss in charging capacity can lead to your solar light not working as expected.
If you notice a significant decrease in your solar light’s runtime, it’s a sign that the batteries are losing their charging capacity.
For instance, if your solar light used to work for 10 hours and now it can only stay on for 5 hours even after a sunny day, it’s probably time to replace the batteries.
Related Article: How Long Do Solar Lights Last At Night
3. Damaged Wire Connection Between Solar Panel and Battery
One of the most common reasons why your solar light isn’t working is the wire between the solar panel and the battery.
This wire is responsible for transferring the generated electricity from the solar panel to the solar battery — charging it in the process.
If this wire is broken, then your batteries won’t charge no matter what you do.
So, your solar lights work just fine until the battery completely drains out, and then it stops functioning.
4. Faulty Light Sensor
Solar lights are equipped with a light sensor, often a photoresistor, that detects the level of ambient light.
This sensor acts like a switch, turning your solar lights on when it gets dark and off when it’s light.
During the day, the sensor keeps the solar lights off while the solar panel charges the battery.
When night falls, the sensor detects the decrease in light and activates the solar lights.
If this sensor is not working correctly, it might not be able to tell when it’s dark, and as a result, your solar lights won’t turn on at night.
There are a few signs that your light sensor might be the problem:
- Your solar lights don’t turn on at night but work fine when tested during the day.
- The solar lights stay on all the time, even during the day.
- The solar lights don’t respond to changes in light conditions.
5. Interference from Nearby Light Sources
Remember that solar light sensor?
Sometimes, nearby light sources, such as solar street lights or your neighbors’ bright lights, can fool the solar light sensor into thinking we’re still daytime.
As a result, your solar lights might not turn on.
6. Insufficient Direct Sunlight Exposure
Let’s set it straight, your solar lights need a good amount of sunlight to work.
It’s pretty simple: no sunlight, no light at night.
The lights’ solar cells soak up enough sunlight during the day, turning it into electrical energy that’s stored in their batteries.
This stored energy is what powers the lights after dark.
But here’s the thing: solar lights need to be in the sun for about 6 to 8 hours a day to charge up properly.
If they’re stuck in a shady spot, under trees, or behind buildings, they won’t get enough sun.
And if they don’t get enough sun, they either won’t turn on at all or they’ll only light up for a little while.
7. Water or Dust Accumulation on Solar Panels
Most solar lights are designed to be weather-resistant, but they’re not immune to the elements.
Over time, dust and residue can build up on the solar panel — covering it and reducing its ability to absorb sunlight.
Water from rain can also build up inside your solar lights, damaging the electric circuit.
While these issues are very unlikely to happen if you opt for high-quality solar-powered lights with an IP rating of 65 or above, it’s still possible, especially if you live in a harsh weather area.

8. Microprocessor Glitches
Like many modern gadgets, solar lights often come equipped with microprocessors.
These tiny computers control the functions of the lights, like turning them on at dusk and off at dawn, or managing power use.
However, microprocessors can sometimes experience glitches – small errors in their software or memory that can cause the lights to behave unpredictably.
For instance, you might find your solar lights not turning on at night, staying on during the day, or flickering without any apparent reason.
These issues can be particularly puzzling because they don’t have a visible cause like a dead battery or a dirty solar panel.
9. Burned-Out LEDs
Light Emitting Diodes (LEDs) are the components that produce the light in your solar lights.
Over time, LEDs can burn out if the battery overcharges or if they are exposed to high temperatures.
Overcharging occurs when the solar lights absorb excessive sunlight, leading to overheating of the LEDs, and eventually burnout.
Similarly, if the solar lights are placed in a hot location, the LEDs can overheat and burn out.
In such cases, you’ll need to replace the LEDs.
This process involves opening the solar light fixture, removing the old LEDs, and soldering in new ones.
If you’re not comfortable doing this yourself, consider seeking professional help or contacting the manufacturer.
10. Incorrectly Adjusted PIR Sensor Sensitivity
This issue only occurs in solar motion-activated lights.
These lights have PIR sensors that work by detecting the infrared radiation (body heat) emitted by live beings.
When these sensors detect heat, they turn on the lights.
It’s that simple.
Now, most of these solar security lights have dials that control the sensitivity of the PIR sensors.
Where the higher the sensitivity, the less infrared radiation is needed to activate the light.
What happens is that sometimes people lower the sensitivity too much that the sensor fails to detect any radiation produced by medium-sized live beings — which causes your lights to stop working.
On the flip side, if the sensitivity is set too high, the lights may turn on for every passing cat, rustling leaves, or even small insects.
This not only drains the battery quickly but also reduces the overall effectiveness of the lights.
To find the right balance, you’ll need to adjust the sensitivity dial.
This might require some trial and error to get it just right.
11. Active Timer Settings
Some solar lights come with a built-in timer function that automatically turns off your lights after a set time of hours — mostly between 2 and 6 hours.
Additionally, some solar security lights have multiple modes — one of them turns the solar light on for 30 seconds when it detects movements.
However, if you’re not aware of these timer settings or if they’re improperly configured, it might seem like your solar lights are malfunctioning.
If that’s the case, you should just check the timer settings and adjust them according to your needs.
12. The Power Switch Is in the Off Position
I hate to say it, but did you make sure the solar light is turned on?
It sounds simple, but it’s an easy detail to overlook.
Almost every solar light has an on/off switch, typically located at the back.
During the day, the solar panel charges the battery, but if the switch is off, the lights won’t turn on when night falls.
So, if your solar lights aren’t lighting up, the first thing to check is this switch.
Related Article: How To Store Solar Lights Over The Winter
How to Fix Solar Lights?
1. Remove The Pull Tab
Open your solar light’s battery casing, remove the pull tab, and then test your lights to see if they’re working.
If they’re not working, move on to the second method.
2. Replace & Test Your Solar Light’s Battery
First, test your solar lights with normal batteries (same voltage).
If the light works, then it’s clear that the problem is either your batteries can’t hold the charge (faulty), or the solar panel is broken.
Here are a few signs that your rechargeable battery is dead:
- Physical Damage or Swelling: These are definite signs that the battery needs to be replaced.
- Inability to Hold a Charge: If your light doesn’t last as long as it should after a day in the sun, it probably means the battery isn’t holding a charge.
- Using a Multimeter: For a more accurate check, use a multimeter. A reading below the battery’s specified voltage suggests it’s time for a new battery.
If it turns out that the battery is the issue, you have two options:
a. Deep Charge Your Battery
When the battery is partially discharged before being recharged, it can develop what’s known as the memory effect.
This effect occurs when a battery is repeatedly recharged without being fully depleted first, causing it to ‘remember’ a lower capacity.
As a result, the battery’s ability to hold a full charge diminishes over time.
Deep charging can help counteract this memory effect. Here’s how to do it:
- Switch your solar light off
- Place it in a sunny spot
- Leave to Charge for 48-72 Hours
- Reactivate the Light
- Observe the Performance
Note: We recommend you do this more regularly, even if your solar lights are just fine. This technique helps your lights to get a full charge, which highly increases your battery life.
b. Buy a New Battery
If the deep charging technique doesn’t work, then it’s time to replace your battery.
But don’t just buy any battery.
Many batteries don’t work well with solar lights, so make sure to check my updated list of the best batteries for solar lights.
3. Inspect and Repair the Solar Light’s Wiring
If you’re still facing issues with your solar lights after checking the battery and pull tab, the next logical step is to examine the wiring.
Here’s how you can do it:
- Access the Wiring: Carefully open up the solar light to get to the internal wiring. This might involve unscrewing the housing or solar panel.
- Inspect for Damage: Look closely at the wires for any signs of wear, tear, or breaks. Focus on the connections between the solar panel, battery, and light.
- Reconnect Loose Wires: If you find any wires that have come loose, securely reattach them.
- Repair Broken Wires: For any broken wires, remove the damaged section, then strip and twist the wire ends back together. You can also use wire connectors for a more secure fix.
- Solder if Necessary: If you’re able, solder the repaired connections for a longer-lasting fix, then insulate with electrical tape or heat-shrink tubing.
- Test Your Repair: Put everything back together and place the solar light in a sunny spot to charge. Check if the light works correctly at night.
4. Fix The Solar Light Sensor
If nothing else seems to resolve your solar light issues, it’s time to focus on the light sensor.
Here’s how you can address potential sensor-related problems:
- Clean the Sensor: Begin by cleaning the sensor. A build-up of dust or dirt can block it from detecting light properly. Gently wipe it with a soft, dry cloth.
- Check Sensor Position: Ensure the sensor is not obstructed by leaves, branches, or other parts of the light fixture. It should have clear exposure to ambient light.
- Adjust Settings: If your solar light has adjustable sensor settings, experiment with these to see if it improves performance.
- Test in Varied Lighting: After cleaning and adjusting, test the light by covering the sensor to mimic darkness and uncovering it to simulate daylight, checking if the light responds correctly.
- Look for Damage: If the light is still not working, carefully examine the sensor for any signs of physical damage like cracks or water ingress.
- Replace the Sensor: In case of noticeable damage, you may need to replace the sensor, ensuring you choose one compatible with your solar light model.
5. Reposition Your Solar Lights Away from Other Light Sources
If you’ve tried fixing the light sensor on your solar lights but they’re still not working right, the next thing to look at is where they’re placed.
Here’s a simple way to fix this:
- Identify Bright Lights: Check for nearby artificial lights like street lamps or house lights.
- Move Solar Lights: Relocate them to darker areas, away from these light sources.
- Adjust Position or Angle: If relocation isn’t possible, adjust their angle to reduce exposure.
- Observe at Night: After repositioning, check if they turn on automatically in the dark.
6. Clean Your Solar Light’s Panel
Cleaning the solar panels is a must-to-do task, whether your solar lights are newly installed or have been lighting up your space for a while.
Here’s how to keep them clean:
- Remove Loose Debris: First, gently brush away any loose leaves, dirt, or debris from the surface of the solar panels.
- Create a Mild Cleaning Solution: Mix a small amount of mild detergent with water. It’s important to use a gentle cleaner to avoid damaging the panel’s surface.
- Wipe the Panels Gently: Using a soft cloth or sponge, carefully wipe down the solar panels with the cleaning solution.
- Rinse the Panels: Rinse off the soap with clean water. If you can, use distilled or deionized water to prevent mineral deposits on the panels.
- Dry the Panels: Dry the panels with a soft, clean cloth or let them air dry. This helps avoid water spots which can interfere with the panel’s ability to absorb sunlight effectively.
7. Ensure Your Lights Are Receiving Adequate Sunlight
As I explained before, for your solar lights to function optimally, they need to receive adequate sunlight.
Here are some steps to ensure they get enough sun:
- Position in Sunlit Areas: Make sure your solar lights are placed in locations where they can get the maximum amount of sunlight during the day. Avoid spots that are usually in the shade.
- Adjust Solar Panel Angles: In the Northern Hemisphere, angle them southward, and in the Southern Hemisphere, northward. This orientation maximizes sunlight capture as the sun’s path changes.
- Trim Overhanging Foliage: If trees or bushes are casting shadows on the solar panels, trim them back to minimize shading.
- Regular Cleaning: Keep the solar panels clean to ensure they can effectively absorb sunlight. Dust and dirt can reduce their efficiency.
- Consider Seasonal Changes: Be aware that the sun’s position changes with the seasons. Adjust the placement and angle of your solar lights accordingly throughout the year.
Related Article: Do Solar Lights Work in Winter?
8. Avoid Charging Your Solar Lights Through Glass
Charging your solar lights through a window or behind glass can lessen their ability to charge efficiently.
This happens because glass filters out certain wavelengths of sunlight that are crucial for charging the solar panels effectively.
So, avoid placing your solar lights behind glass, such as windows, when charging, and always leave your solar light outdoors.
9. Reset The Solar Light
I know that might seem a bit simple, but resetting your solar light can often solve many of its operational issues.
This process is similar to rebooting an electronic device to clear minor glitches.
FAQs
How Do You Fix Solar Lights Not Working?
To fix solar lights not working, check and remove the battery pull tab, replace or deep charge the batteries, repair any damaged wiring, clean the solar panels, and ensure they’re positioned in direct sunlight.
How Do You Reset a Solar Light?
To reset a solar light, turn off the light using its power switch, wait for a few seconds to minutes, and then turn it back on to reset.
Why Are My Solar Lights Not Working All Night?
Your solar lights aren’t working at night probably due to depleted batteries, insufficient daily sunlight exposure, or the light sensor being affected by nearby artificial light sources.
Where Is the Sensor on Solar Lights?
The sensor on solar lights is located on the solar panel or near the LED lights, designed to detect ambient light levels.
Your Last Resort
Different brands have different solar light designs, and it’s almost impossible to cover all the issues that occur with solar lights — unless you want to read a 50,000 words article.
Therefore, if none of the previously mentioned tips seems to work, then you should contact your manufacturer and ask them for help or even use the “warranty card.”
We hope you enjoyed this article as much as we did.
If you have any questions, please share them with us in the comments section below. We’ll be happy to help!


The red light in the solar light is not getting on.
What do you mean by “red light”?
Was very helpful & resolved my solar lights not working issue!! 😊
Happy I could help 😀
My lights were working, took out batteries and stored in attic for 2 months. Now don’t work at all.
Do the info you supply refer to garden solar lights?
Where is the sensor in garden solar lights?
At top of the solar panel
Hi ,
I have bought 2 10 packs of click solar lights from Bunnings and out both packs only 10 are working .
I have solar LED Christmas lights from Big Lots. They only have a push button On or Off switch. After the initial charging they stay lit even in daylight or inside light.